Central Venous Catheter Kit & Set
Product Descripotion
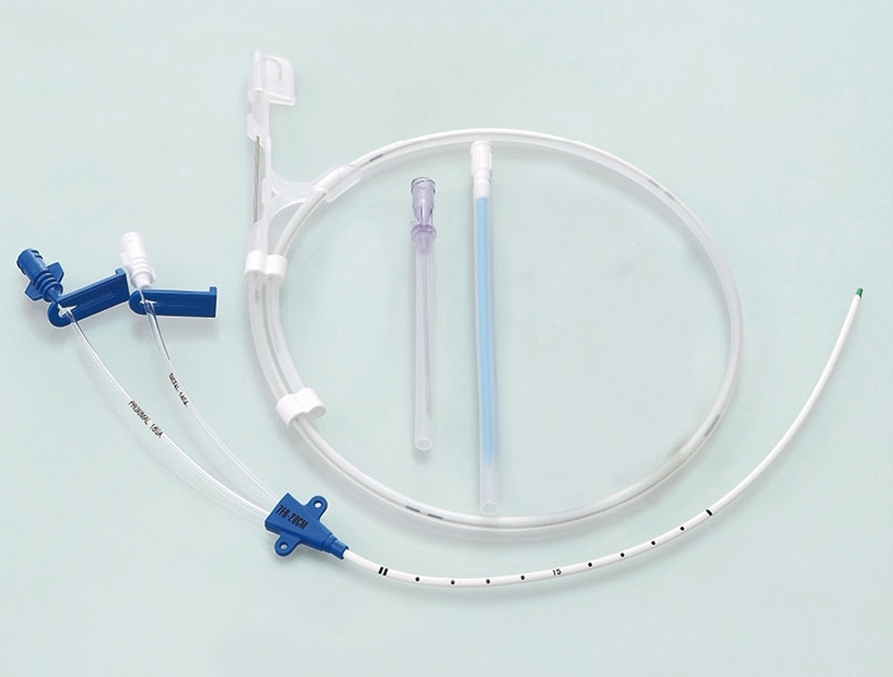
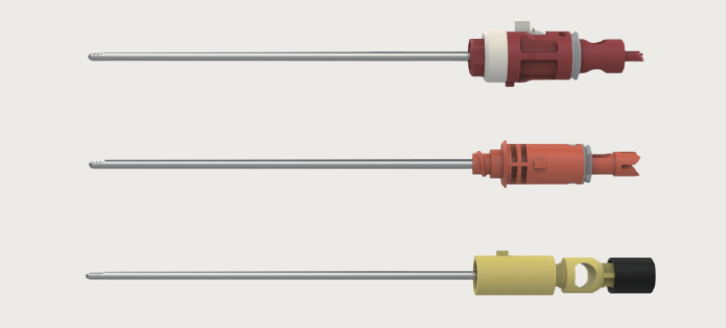
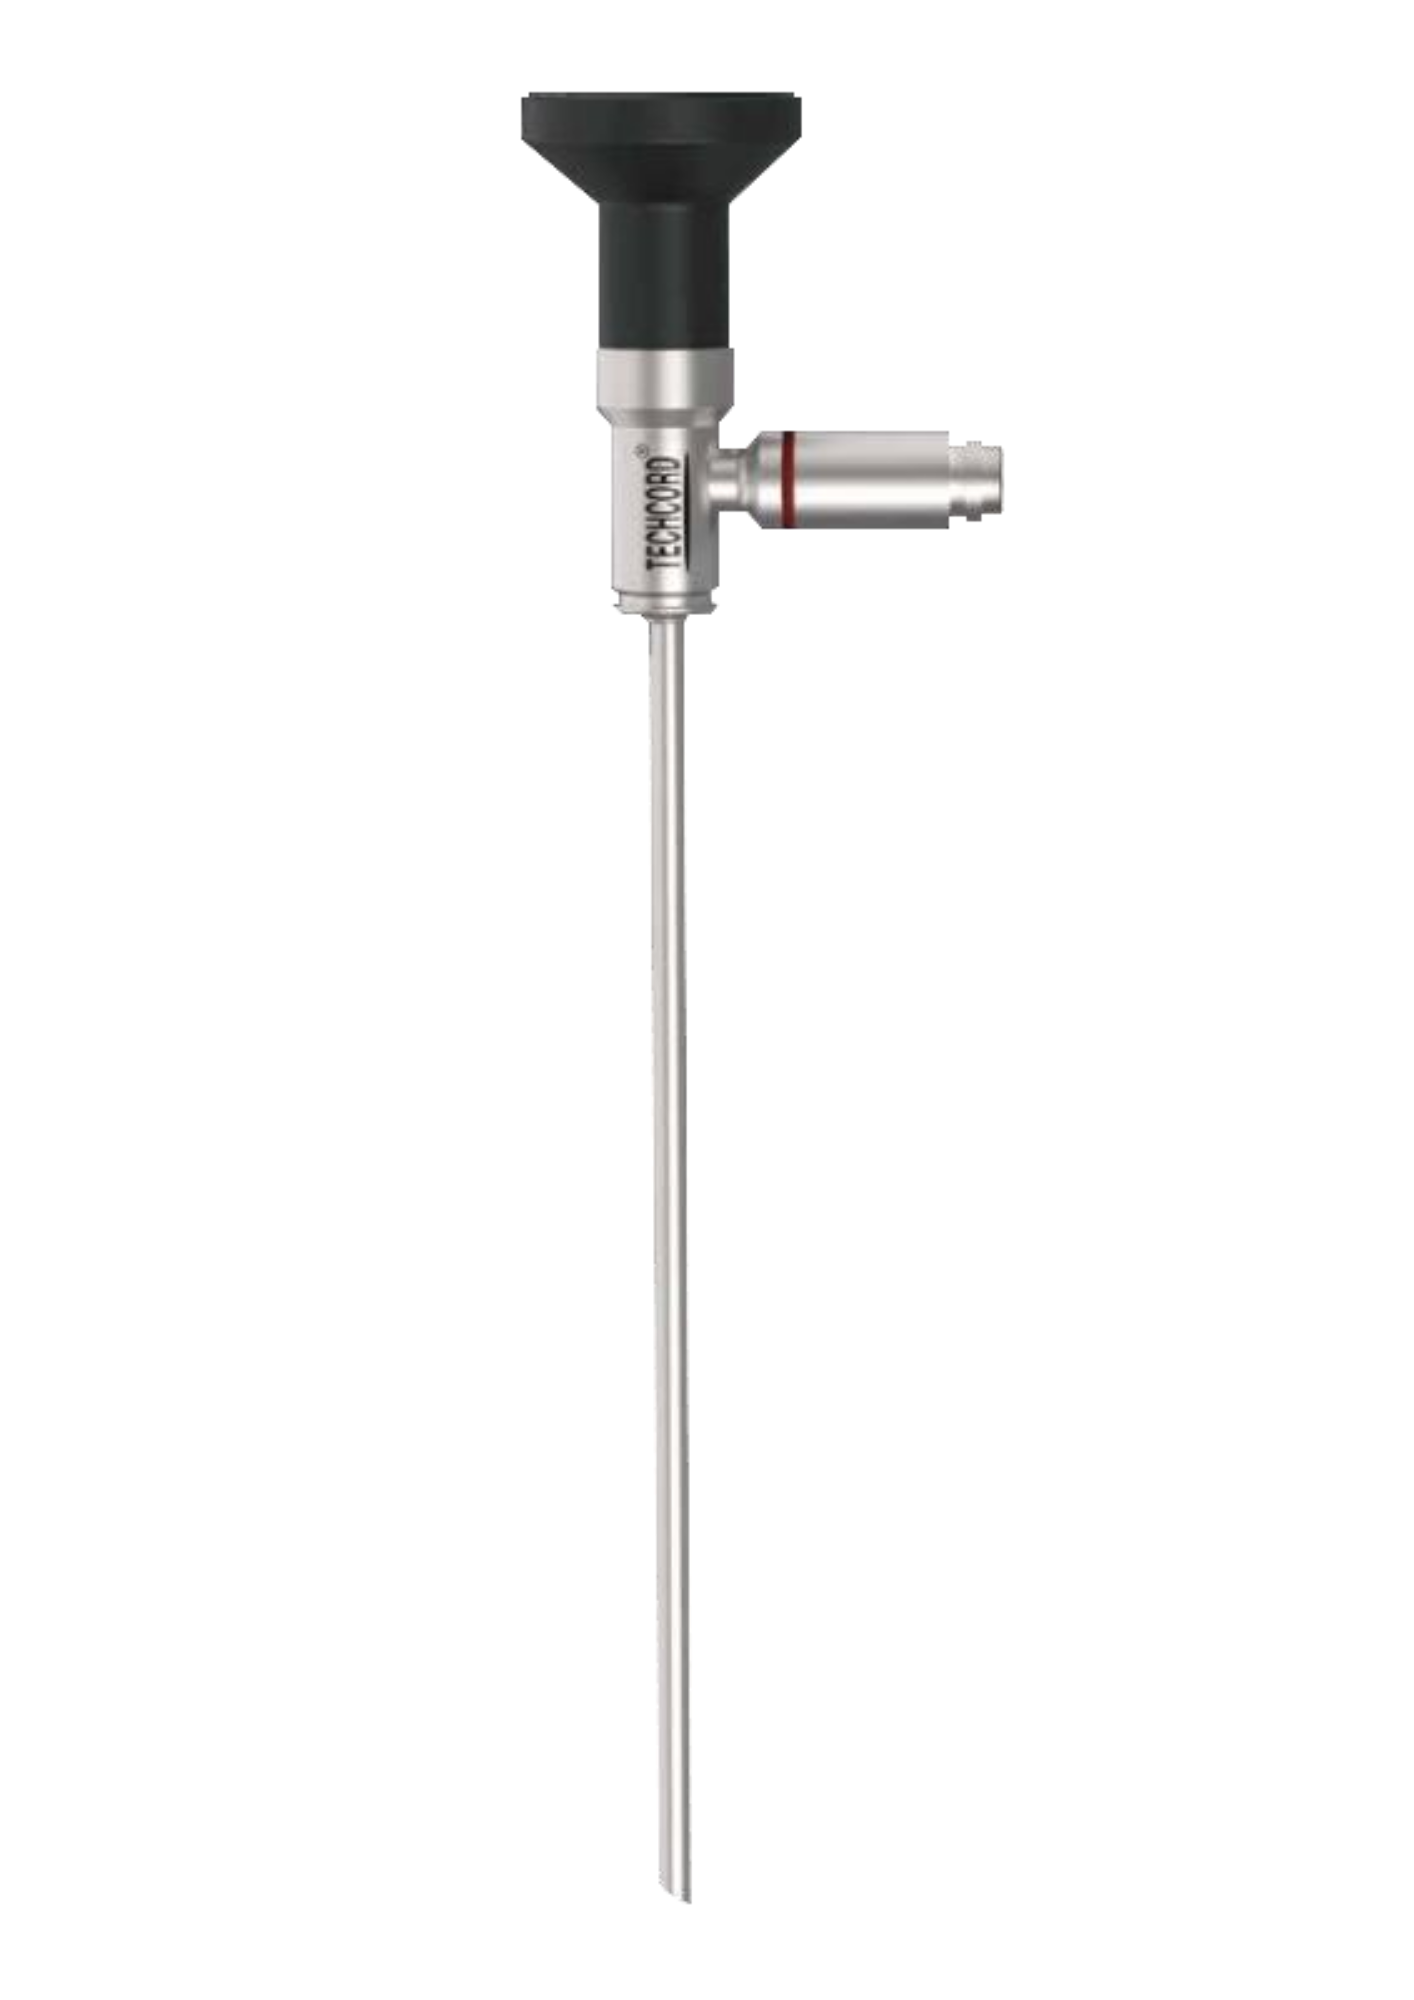
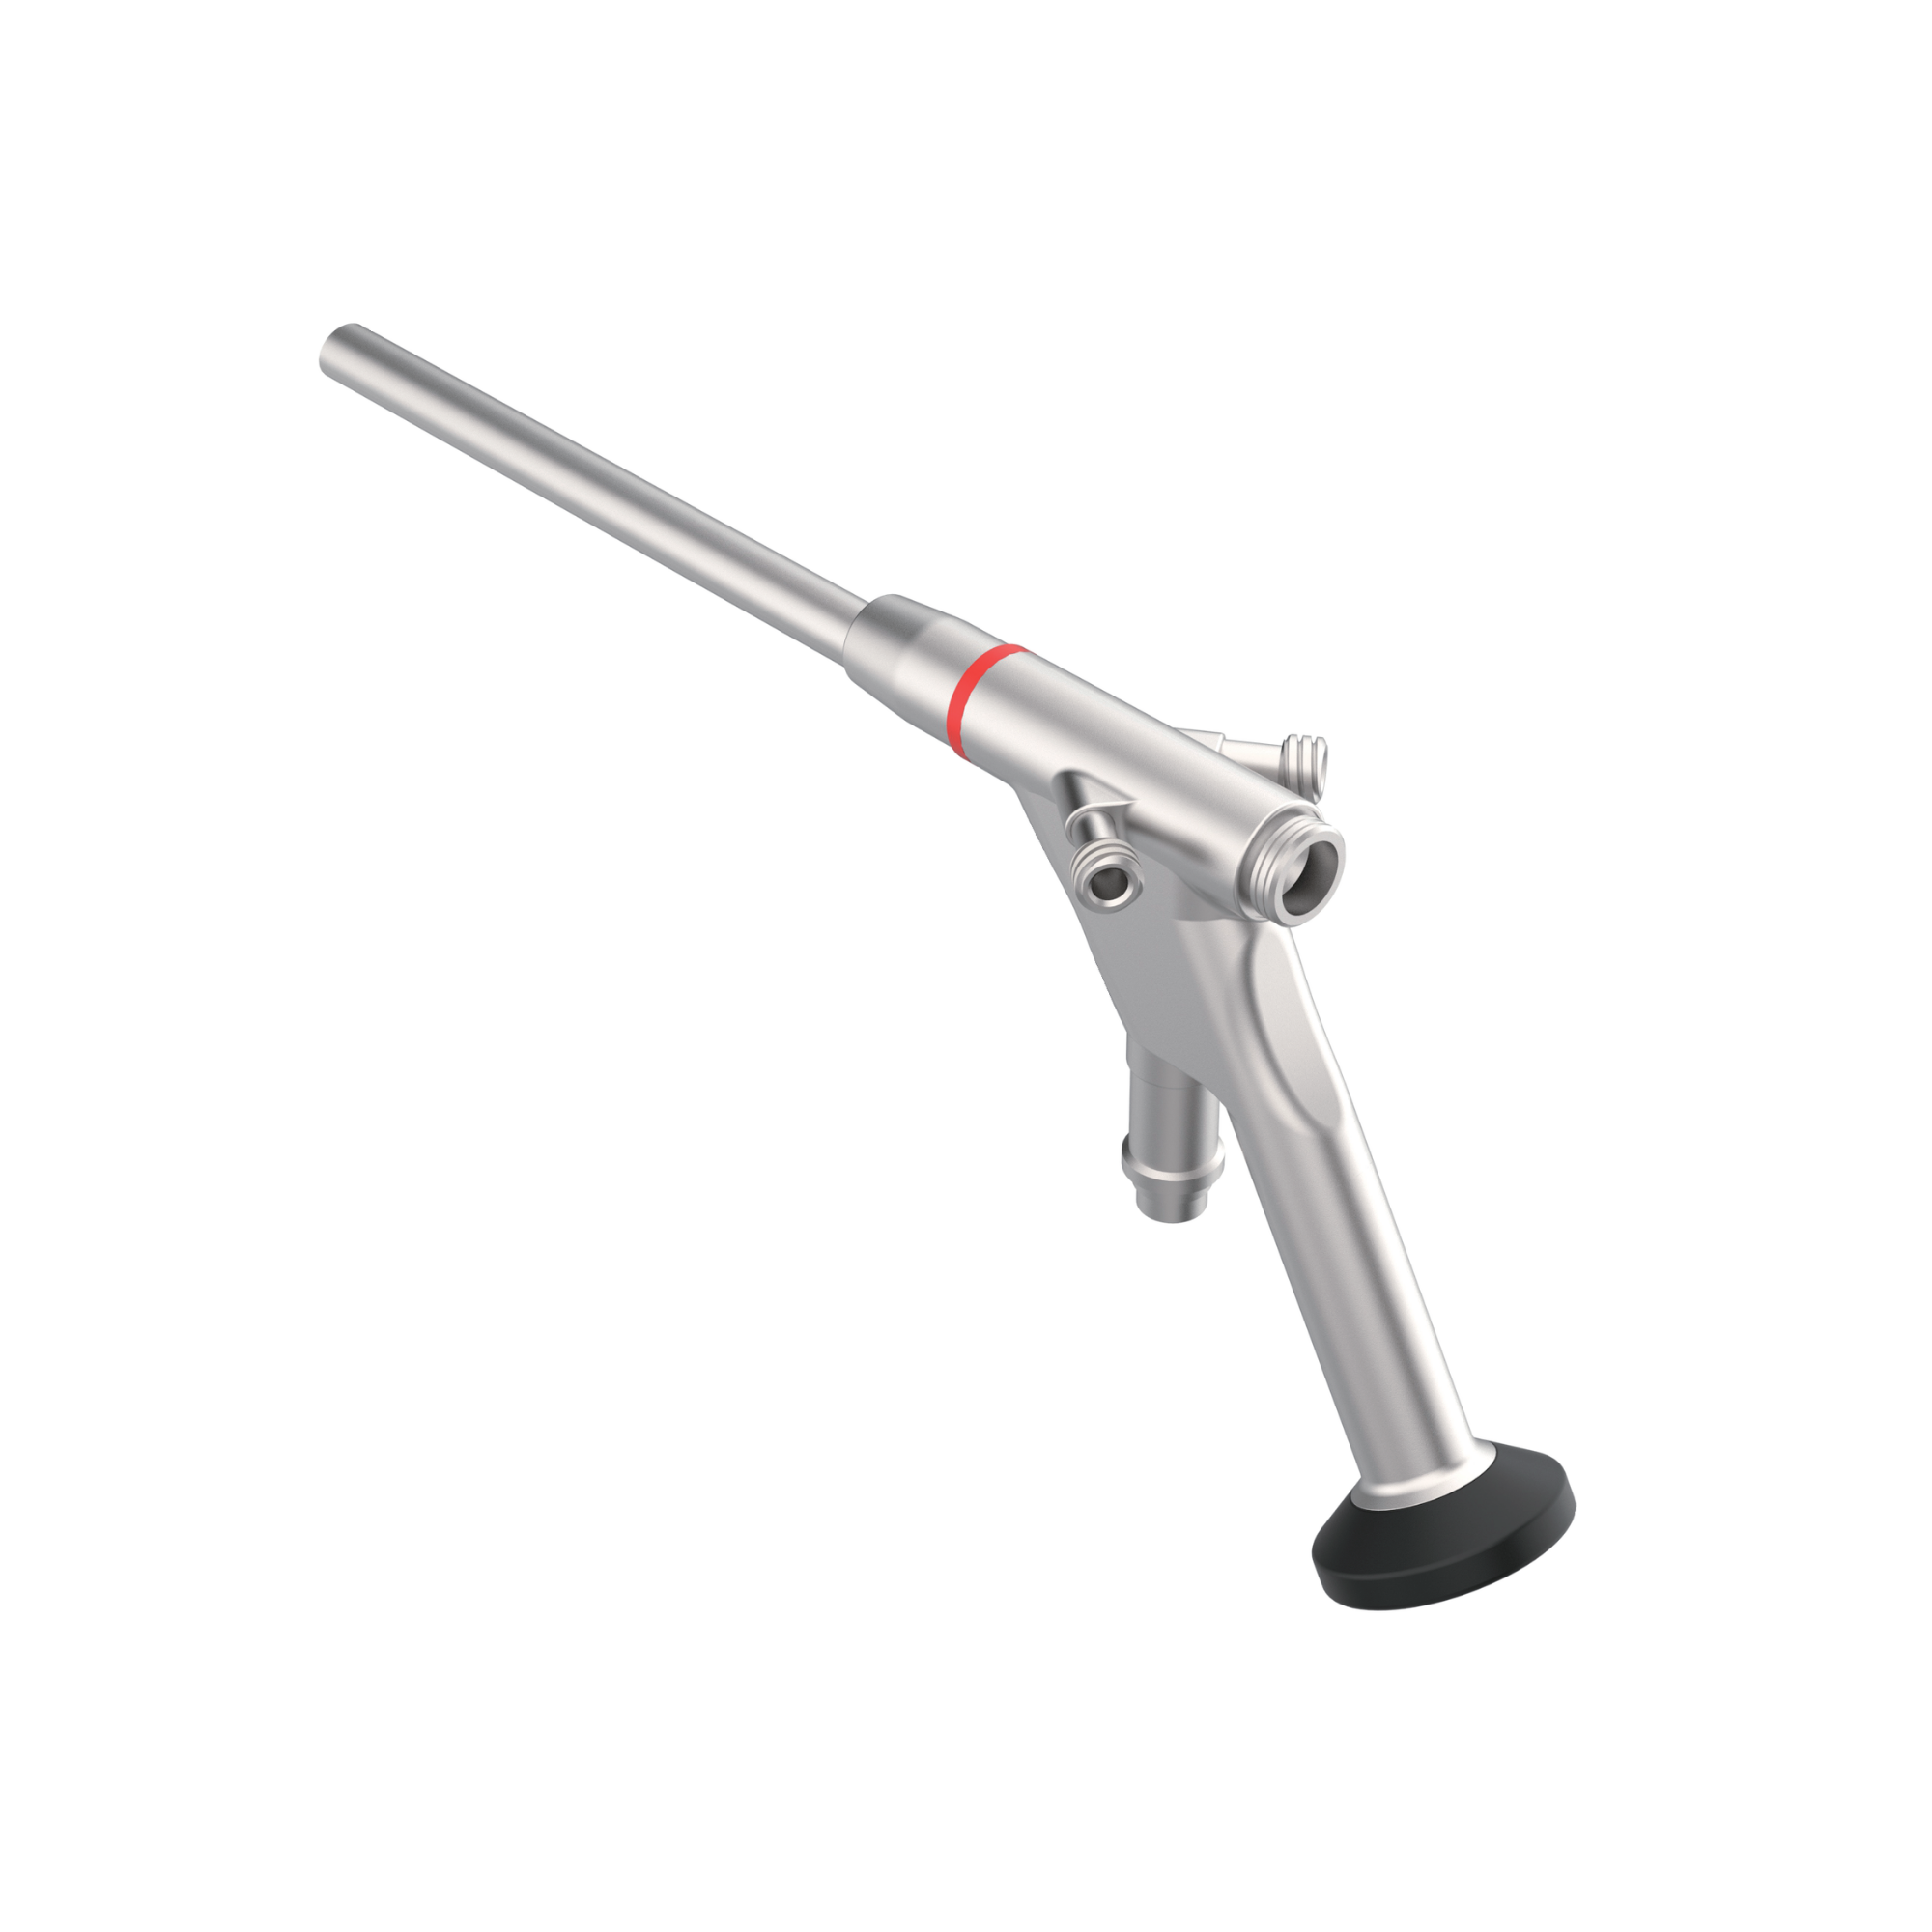
The ABLE Central Venous Catheters (CVC) are a sterile, single use range of short term polyurethane catheters designed to facilitate infusion therapy in a critical care environment. They are available in four configurations; single, double, triple and quad lumen and in a variety of lengths. The multi lumen variants provide dedicated lumens for infusion therapy, pressure monitoring and venous sampling. The CVC’s are packaged along with the components and accessories considered necessary for their percutaneous insertion. All CVC kit and sets are sterilized by ethylene oxide.
Features & Benefits
Movable wing/clamp allows anchorage at puncture site regardless of depth of catheter. This minimizes trauma and irritation to the exit site. Printed depth markings assists in accurate central venous placement from the right or left subclavian or jugular vein approcahes.
Soft tips are less traumatic to the vessel, minimizing vessel erosion, hemothorax, and cardiac tamponade. Available in single, doule, triple, and quad lumen versions. Radiopacity allows fluoroscopic confirmation of catheter placement. The multi-lumen versions are more radiopaque at the tip to easily confirm fluoroscopic tip placement. Vessel diators allow “super soft”catheters to be easily placed percutaneously, thereby ensuring a soft cateter/vein interface.
Quality & Economy-sold at competitive prices and manufactured under world class requirements.
![]()

To order, call: (+855) 093 265 939 (24/7 support)
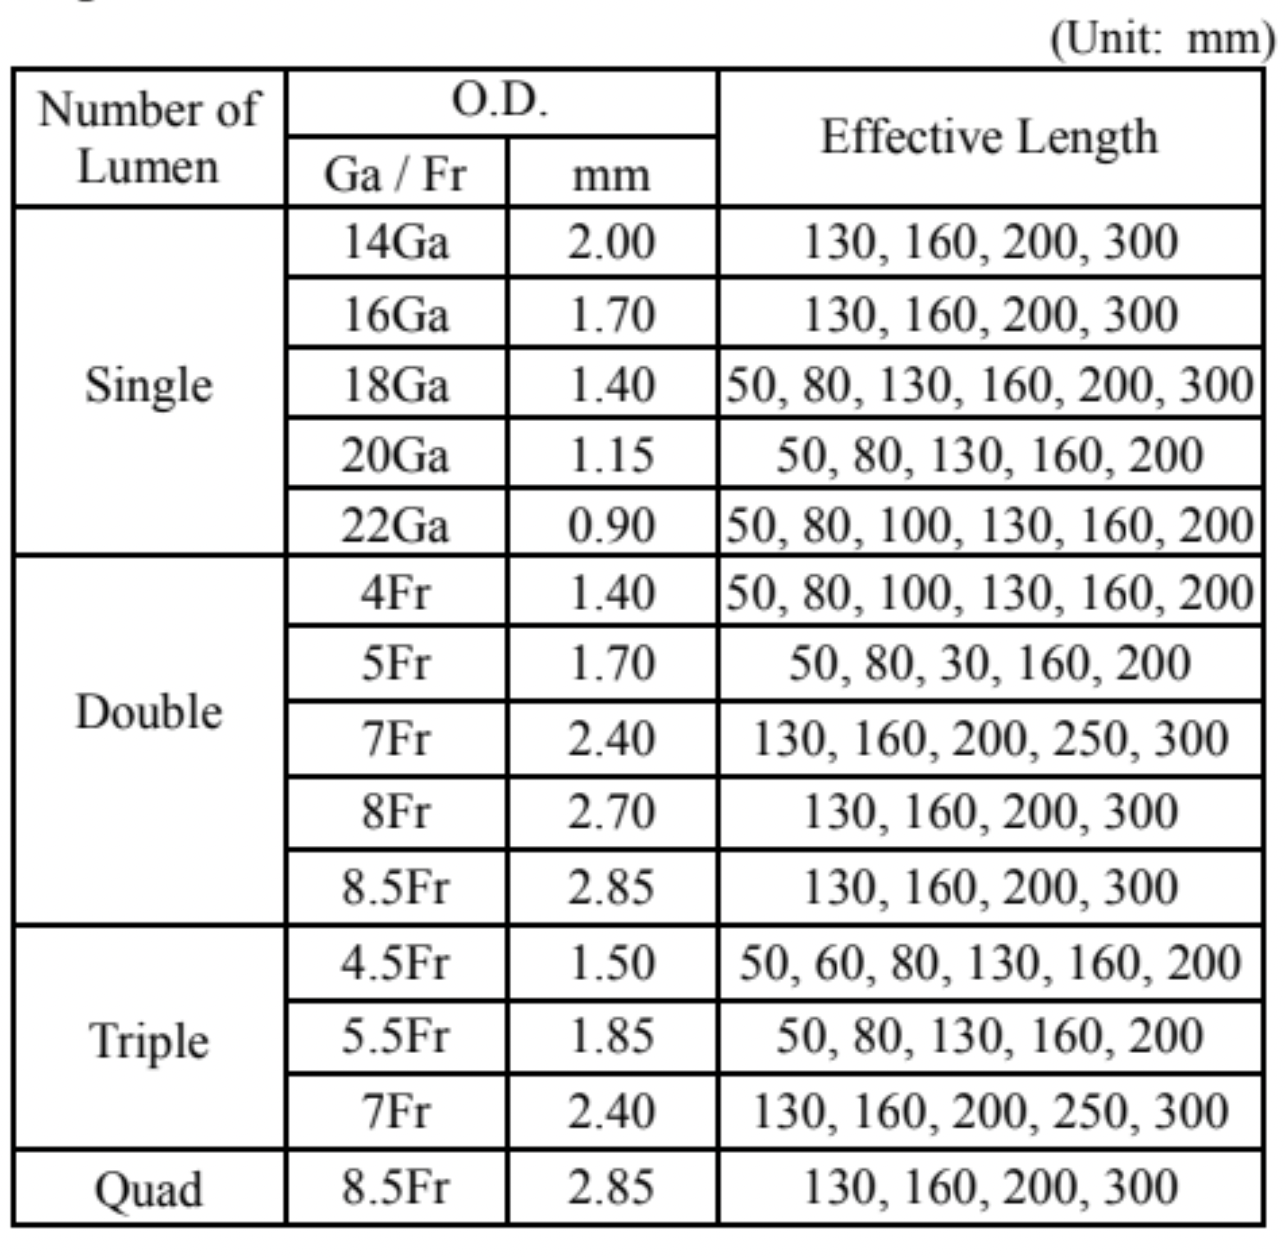
Specification
Intended Use
The ABLE® Central Venous Catheters may be applicable to the one of following therapy:
- Monitor of central venous pressure;
- Continuous or discontinuous venous transfusion;
- Blood sampling.
The Catheter is surgically penetrated into three optional puncture points depended on the clinical requirement with Seldinger Technique. The Insertion Sites are :
- Internal jugular vein;
- Subclavian vein;
- Femoral vein.
It is possible to be inserted inside the body for less than 30days. If duration exceeds 30 days, it may occure the risk of combining the catheter and inside tissue, which result in serious incident.
Configuration
The main raw materials used in the product are polymeric materials and stainless steel. The major components of the KIT are: Catheter, Guidewire, Dilator, Syringe and Puncture Needle. The major components of the SET are: all the components of the KIT, Surgery towel, Disinfect brush, Medical gauze, Absorbent cotton, medical glove, Suture needle and Surgery sheet.
Preparation
- The selection of the insertion site and the appropriate catheter type and length is at the sole discretion of the physician.
- Flush each of the catheter lumens with saline expelling all the air then clamp the catheter extensions to ensure that the saline does not inadvertently drain from the catheter. Use the integral clamps provided.
Insertion
- Administer sufficient local anaesthetic to completely anaesthetise the insertion site.
- Insert the introducer needle into target vein. Aspirate to ensure proper placement.
- Insert the flexible end of the guide wire into the introducer needle and advance the guide wire with forward motion into the target vein. Use ultrasonic to ensure a correct insertion, if necessary.
- Remove the needle leaving the guidewire in the vessel and enlarge the cutaneous puncture site with a scalpel.
- Thread the vessel dilator over the proximal end of the guide wire and dilate the subcutaneous tissue and vein wall to facilitate the insertion of the catheter.
- Remove the vessel dilator leaving the guide wire in place.
- Open the distal extension clamp and thread the catheter over the proximal end of the guide wire.
- Ease the catheter through the subcutaneous tissue and into the target vein.
- Once proper placement is confirmed, remove the guidewire and close the clamp.
- Attach a syringe to each of the extensions in turn. Open the clamp and blood should aspirate easily. If the lumens exhibit excessive resistance to blood aspiration, the catheter may need to be rotated or repositioned to obtain adequate blood flows.
- Once adequate aspiration has been established, each lumen should be locked according to standard hospital protocols.
- Close the clamp and attach the injection cap(s) onto the extension line female luer(s).
Catheter Fixed and Wound Dressing
The catheter should be fixed and the insertion site dressed according to standard hospital protocols. “WARNING: Do not suture the catheter tubing itself.” After first bullet point of catheter sucurement. If the catheter is not to be used immediately, follow standard hospital protocols for catheter locking.
Infusion
- The locking solution should be removed from each lumen prior to instigating infusion and aspiration should be based on standard hospital protocol.
- Check all connections carefully before initiating any infusion. Infusion protocols should be determined by physician prescription.
Blood Sampling
When taking blood samples through the catheter temporarily shut off the other lumen(s) through which solutions are being infused.
Daily Care
Daily care of the puncture site should be undertaken according to standard hospital protocols.
Catheter Removal
- Carefully remove all securement devices and dressings, and then slowly withdraw the catheter.
- Apply pressure to the exit site for approximately 10-15 minutes or until bleeding stops.
- Apply dressings in accordance with standard hospital protocols.
- Dispose of the device as a contaminated medical device and in accordance with hospital protocols.
Contraindications
- Infection or cut wound around the puncture area.
- Dysfunction of blood coagulation.
- During the anticoagulant treatment.
- Symptoms of inadaptability to puncture operation, such as Pneumothorax, vein sclerosis.
- Abnormal or unclear anatomical situation at the penetration area, such as sever emphysema, obviously inadaptability from previous operation.
Warnings and precautions
- The catheter is to be inserted and removed only by a suitably qualified, physician or nurse;
- The clinical benefit of the use of CVC’s must be evaluated against the recognized risks and complications of the procedure.
- Do not use if the packaging has been previously opened or damaged, or any part of the catheter is missing or damaged.
- Observe aseptic technique at all times when handling the catheter and/ or the insertion components and in accordance with standard hospital protocols.
- Verify the position of the catheter tip by X-ray.
- Use only luer lock (threaded) connector and syringes with the catheter and do not over-tighten.
- Do not use acetone or ethanol solution on any part of the catheter tubing as this may cause catheter damage.
- Only ever insert the flexible end of the guidwire into the vessel. Never manipulate the guidewire if resistance is encountered. In this instance discontinue the procedure and remove the guidewire and device as a single unit.
- Do not resterilize.