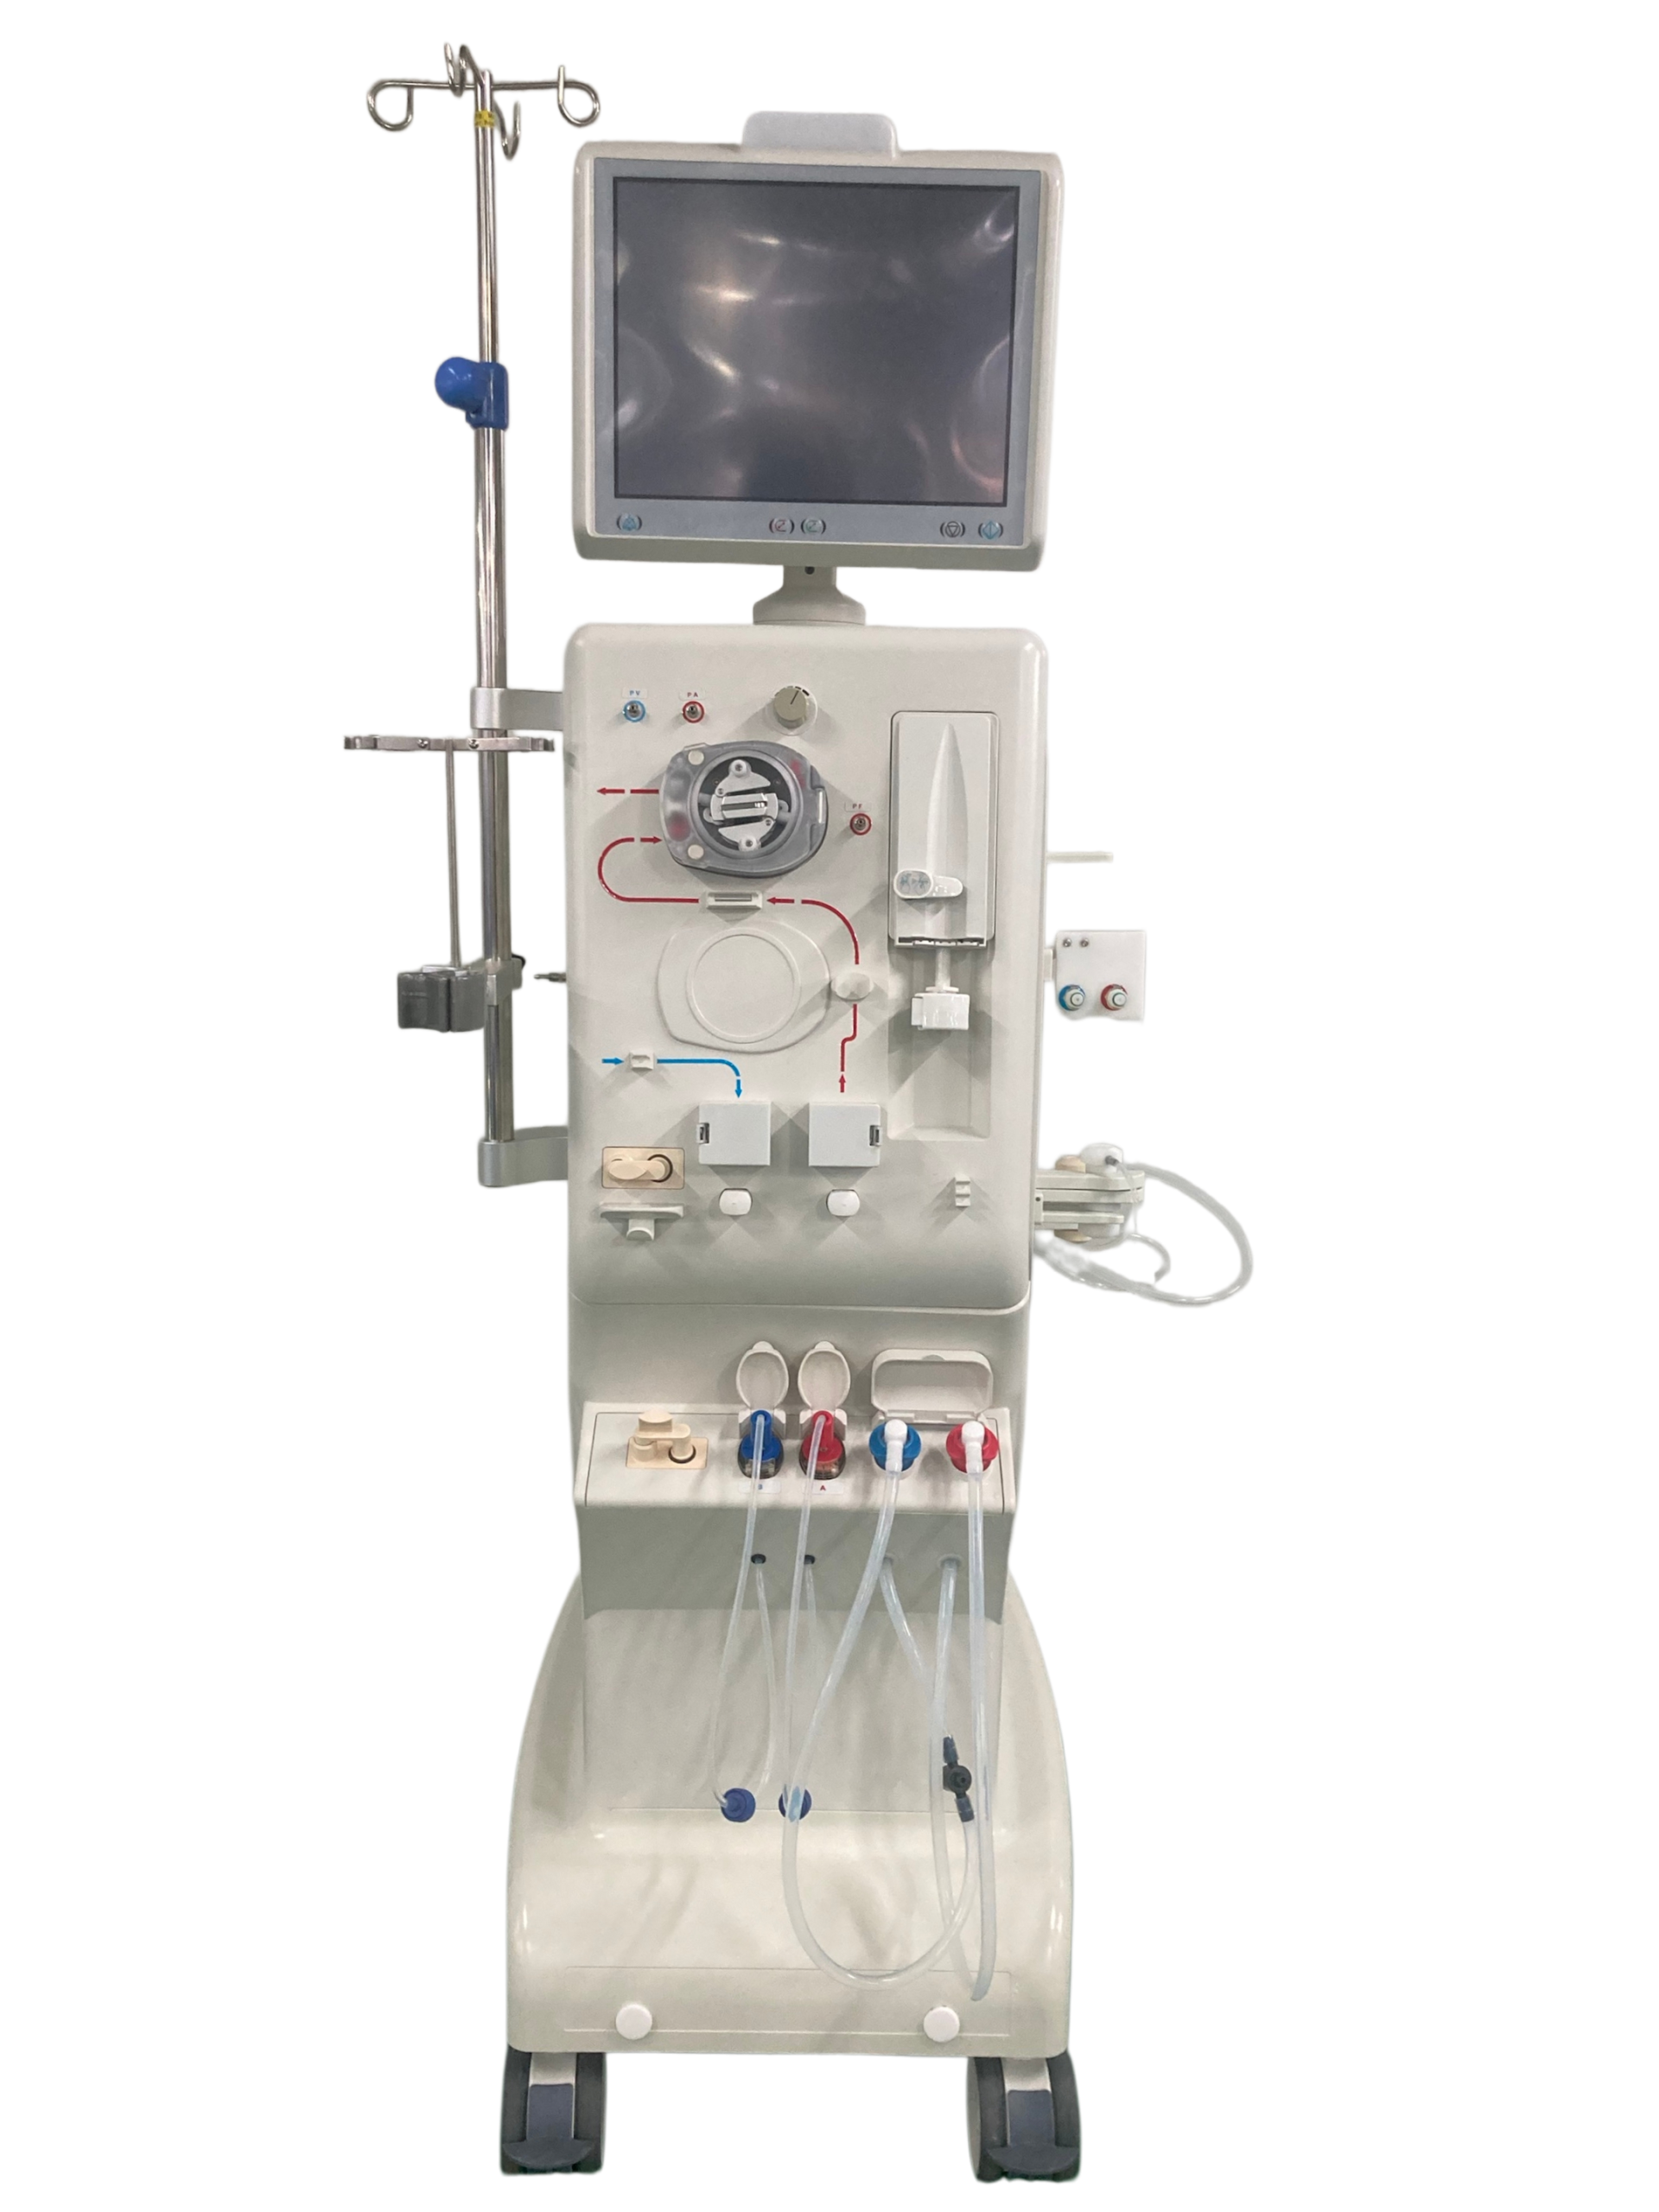
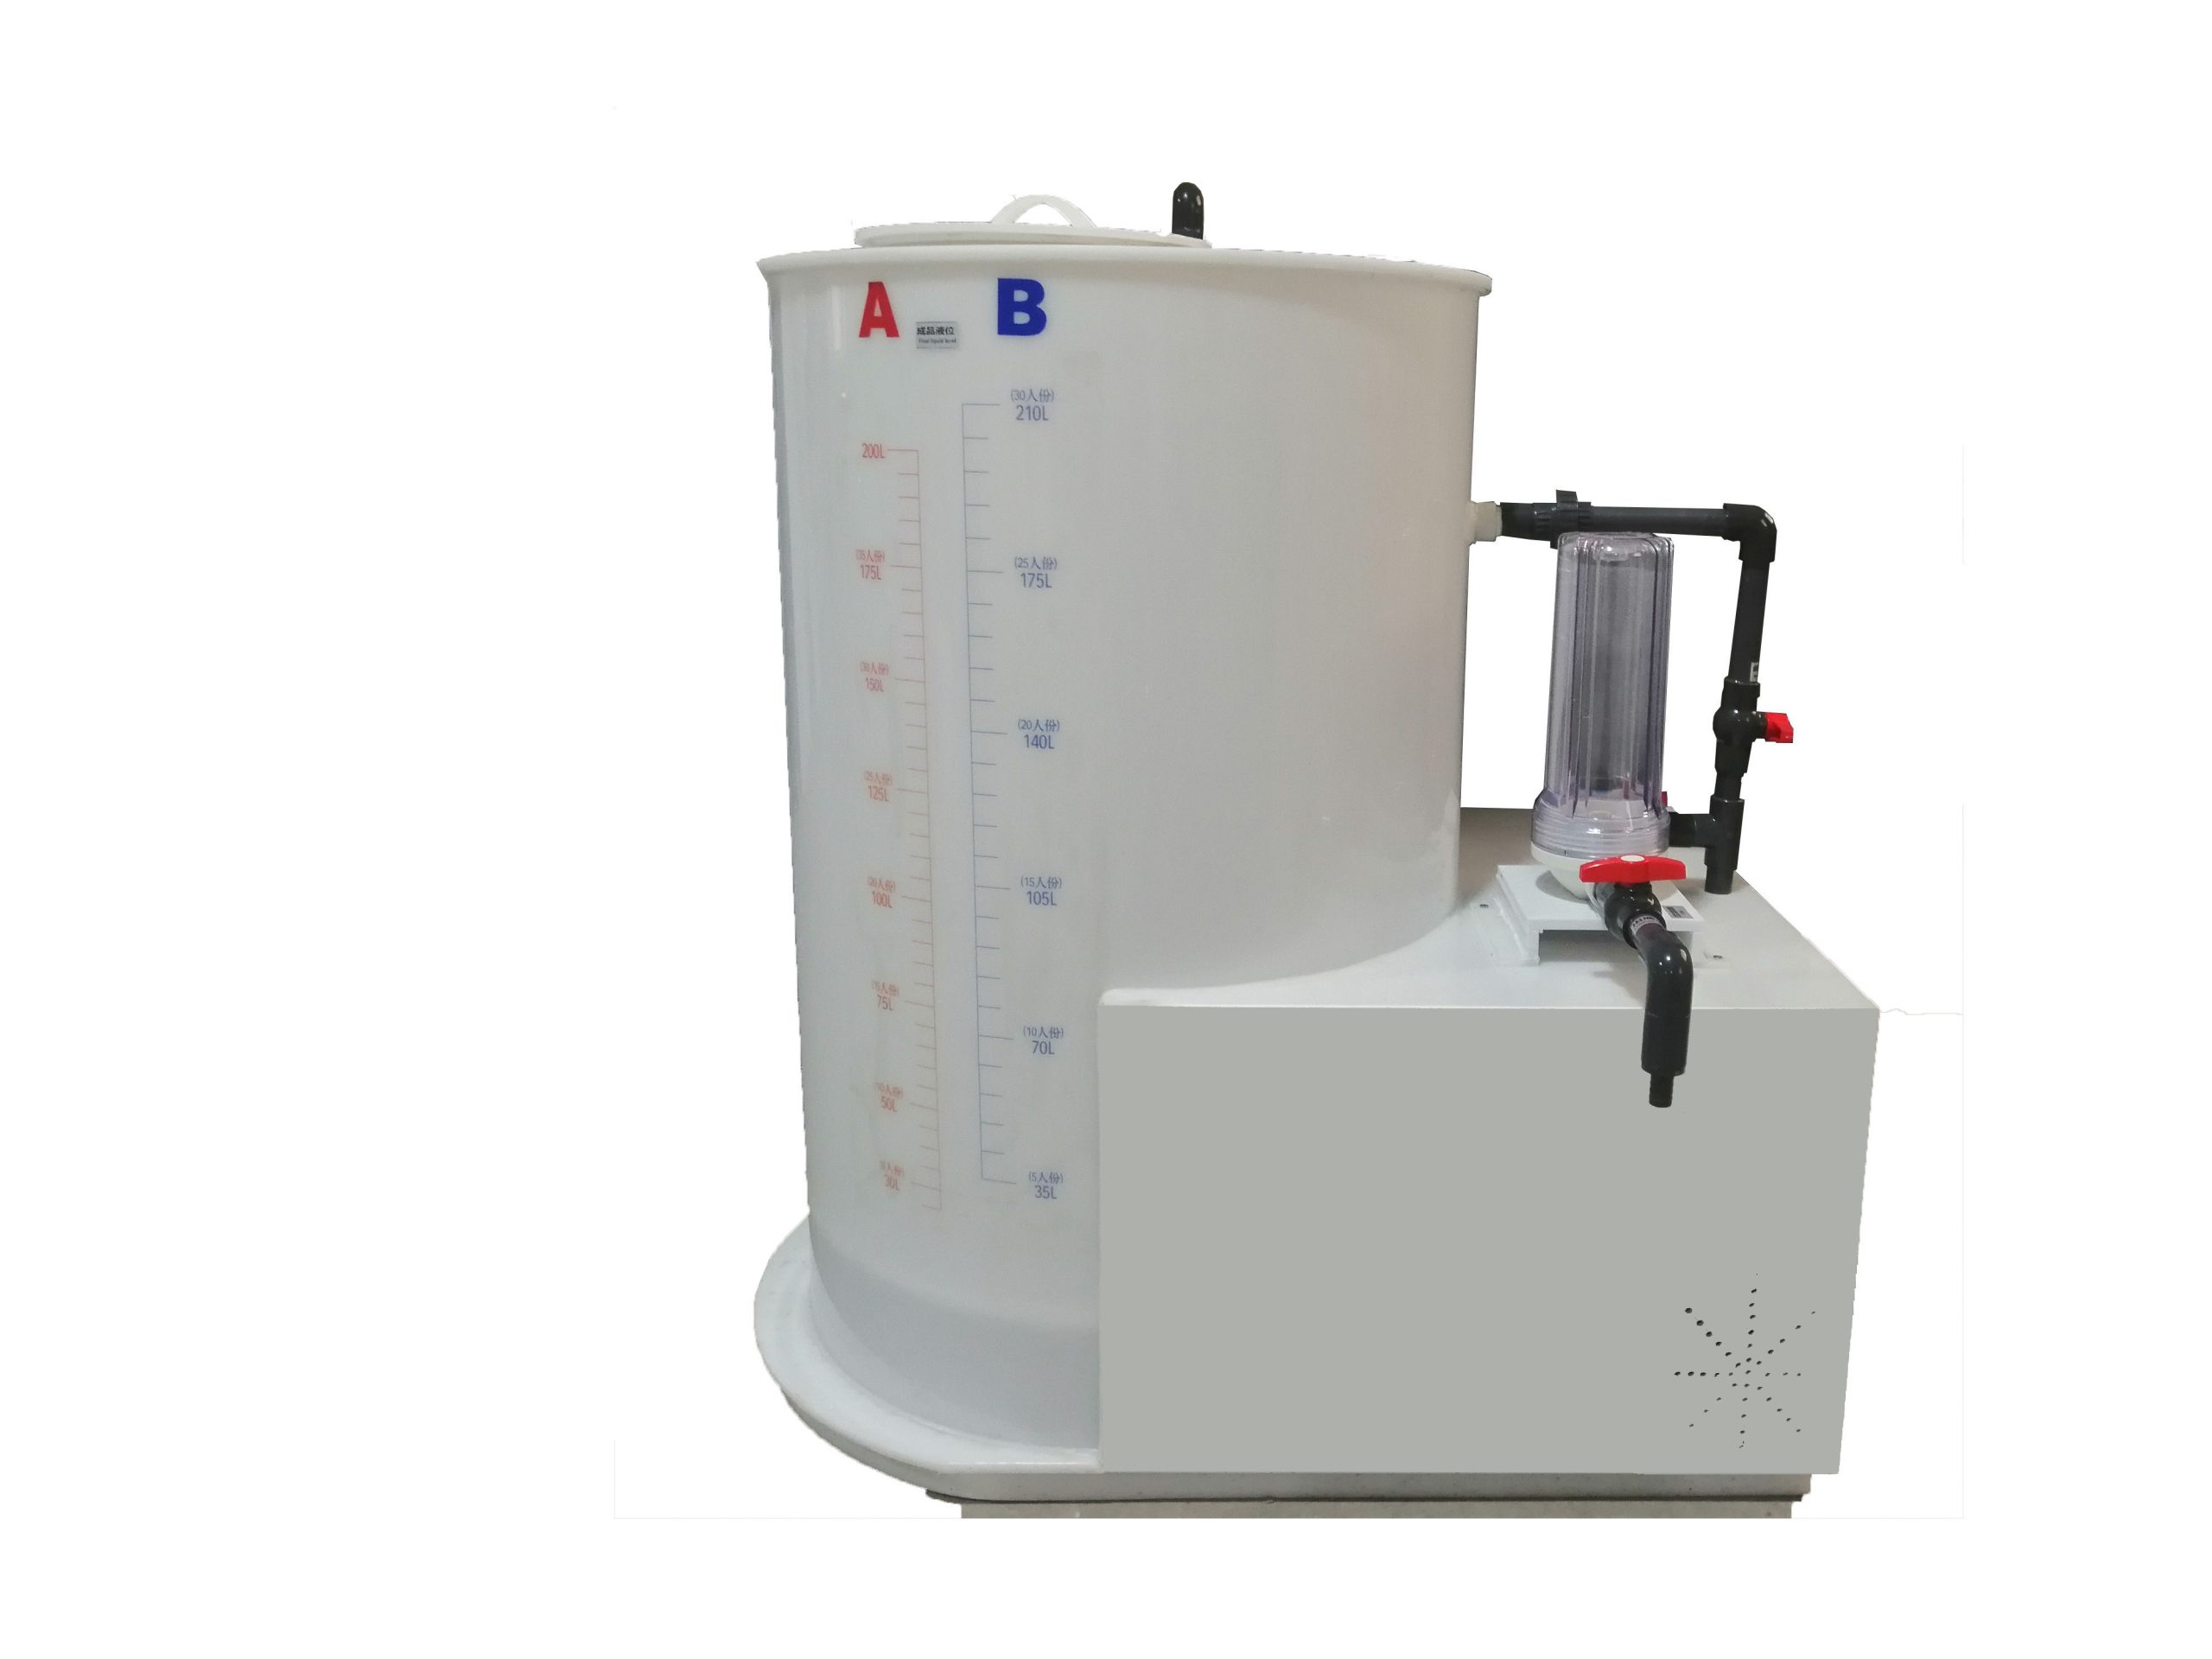
R.O Water Purification Machine
Product Description:
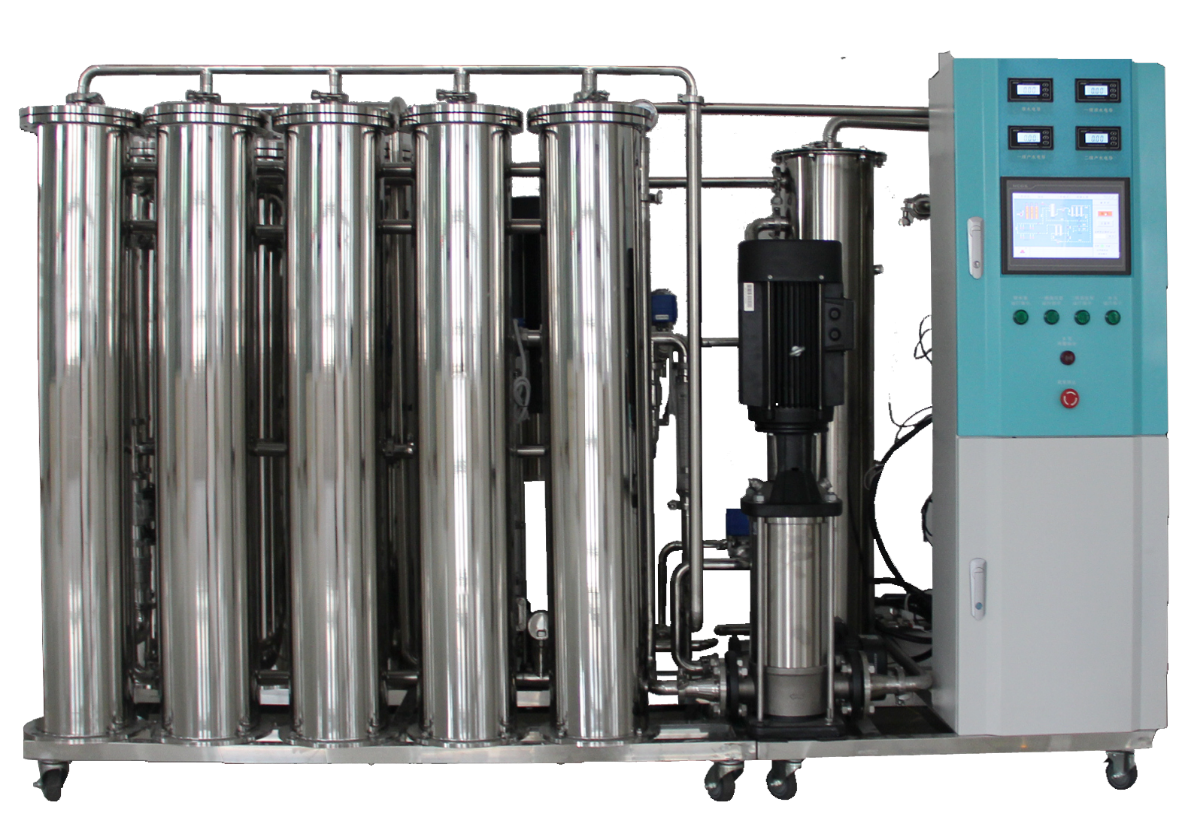
An R.O water purification machine is a system designed to produce high-purity water by removing dissolved salts, microorganisms, organic substances, and other impurities from raw water. It works using the Reverse Osmosis process, where water is forced through a semi-permeable membrane that blocks contaminants while allowing clean water to pass.
This system is widely used in medical (e.g., hemodialysis), laboratory, and industrial applications, where consistent and safe water quality is critical. It typically includes multiple filtration stages to ensure efficient purification and reliable performance.
Key Features
- Removes salts, bacteria, viruses, and impurities
- Uses high-efficiency RO membrane filtration
- Produces high-purity water
- Multi-stage filtration system
- Automatic operation and control
- Reduces TDS (Total Dissolved Solids)
- Built-in safety features
- Durable and corrosion-resistant
![]()

![]()
To order, call: (+855) 093 265 939 (24/7 support)
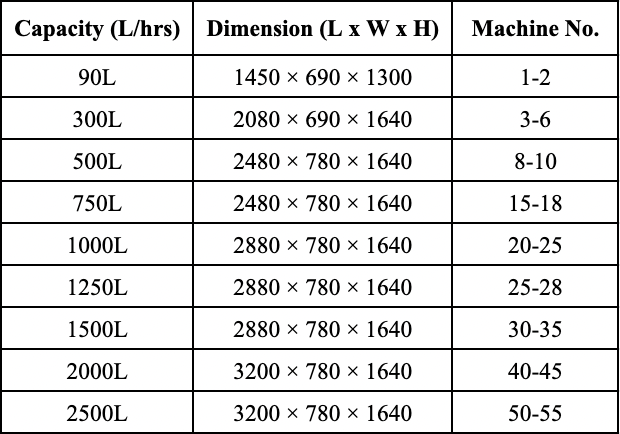
Specification:
Indication: Hemodialysis water purification system is used for preparing water for multi-bed hemodialysis, water for powder preparation concentrate, water for dialysate preparation, water for dialyzer reuse for medical department.
Instruction for Use:
1. Device Operation
1.1. Preparation for start-up
- The waterway is smooth and all valve are adjusted to the proper position.
- The circuit is smooth,and there are no wrong phase and missing phase of 3-phase power supply
1.2. Parameter Setting
- working mode setting
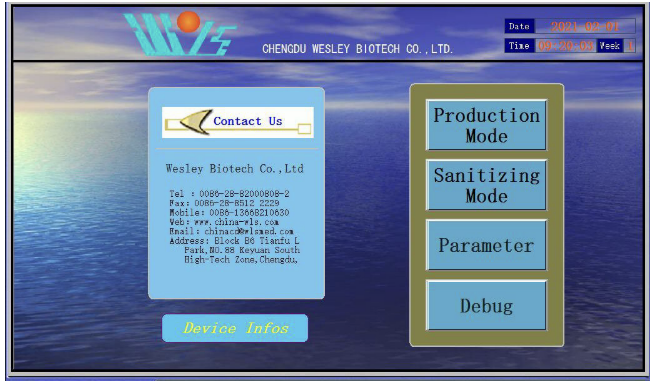
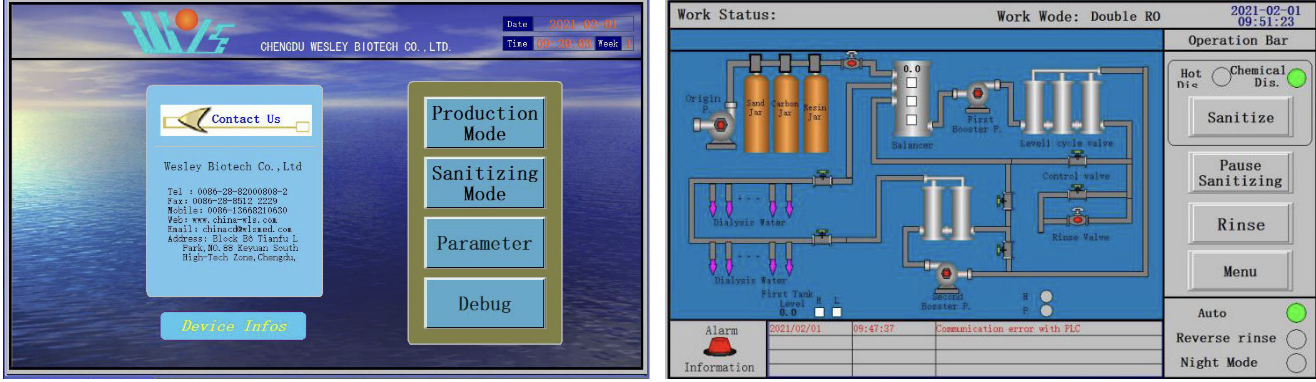
Click “parameter setting” (as shown in the figure) in the main menu to set parameters.
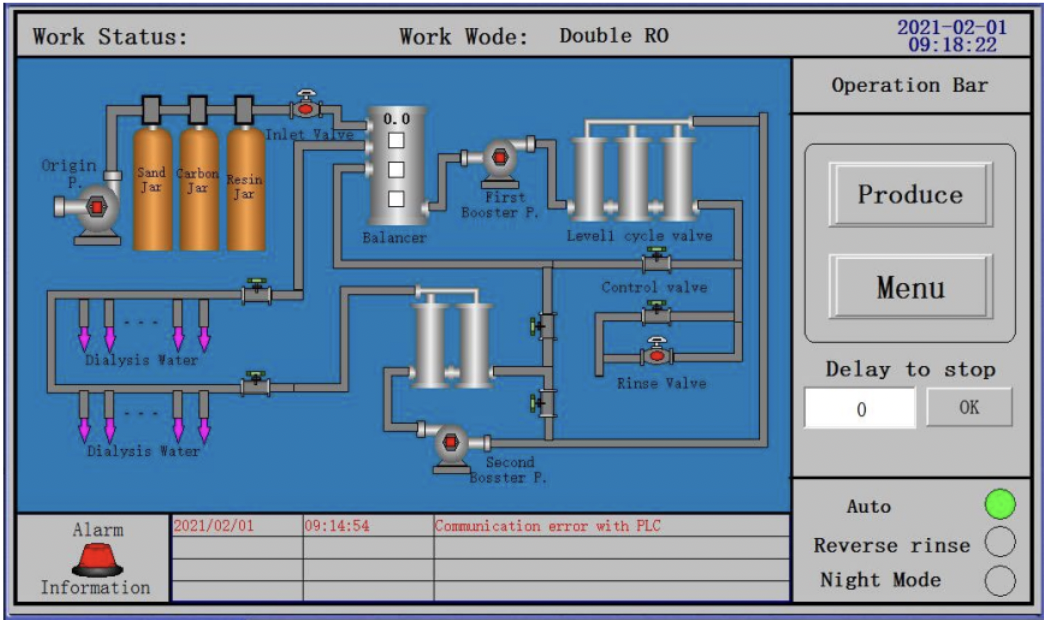
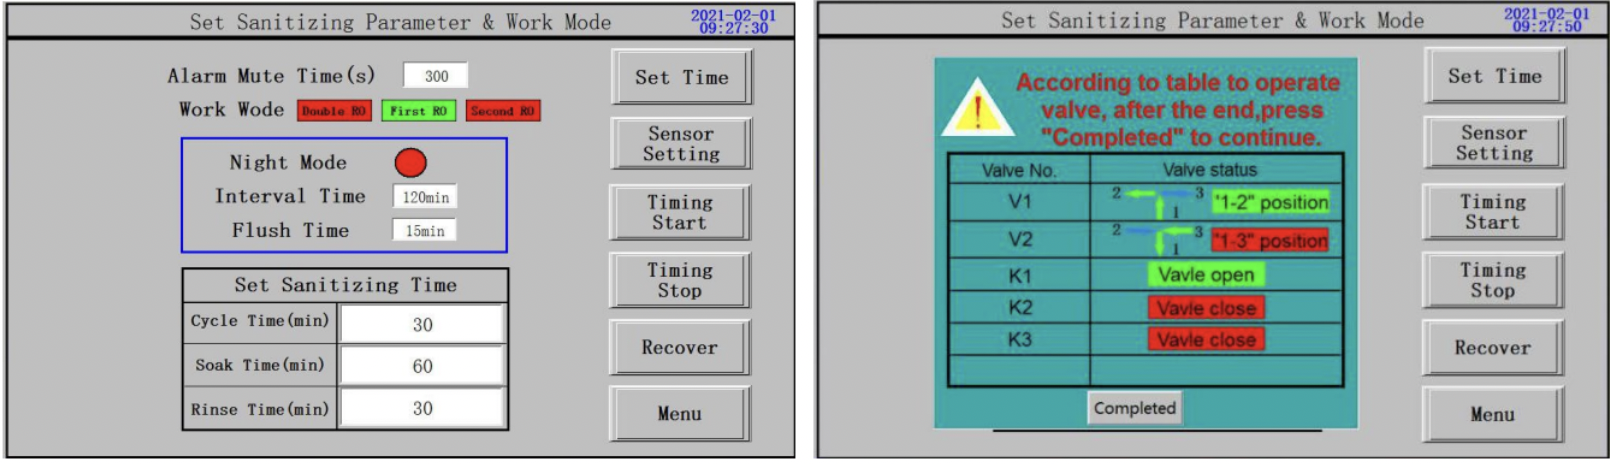
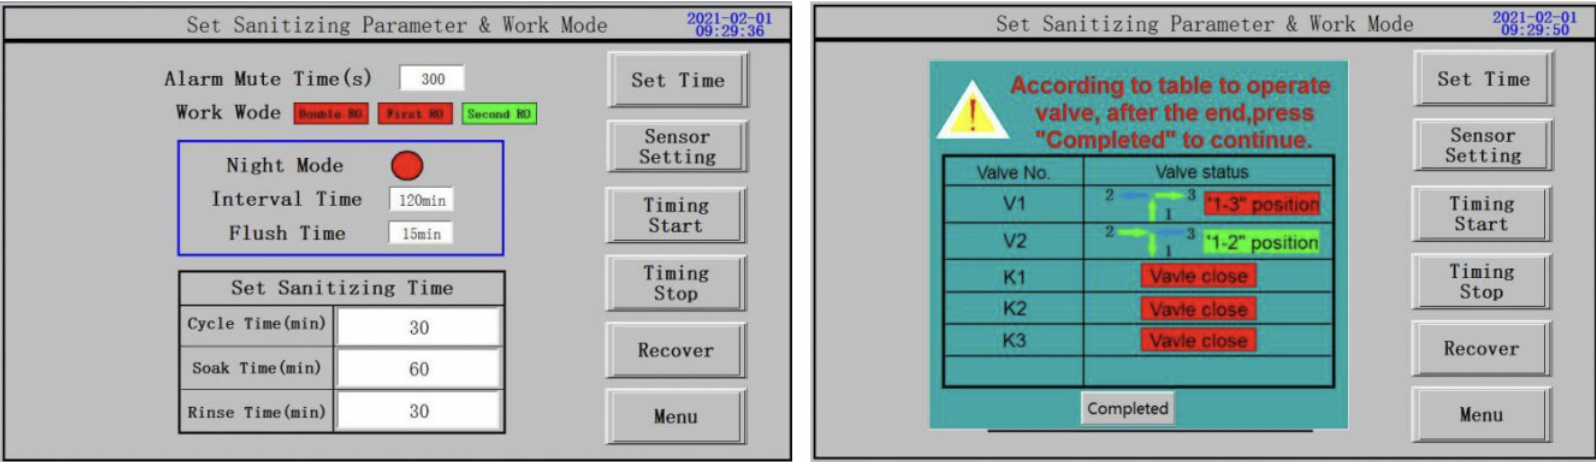
Set the Production mode in the drop-down menu of “Production mode”, such as “double R.O.” , “Single R.O.”. The switch operation of the valves will be reminded when setting the production mode. After operation of valves switch, click “operation is finished” to set the corresponding working mode.

“Double R.O.” setting as figure
“Single R.O.” setting as figure
“Second stage R.O.” setting as figure
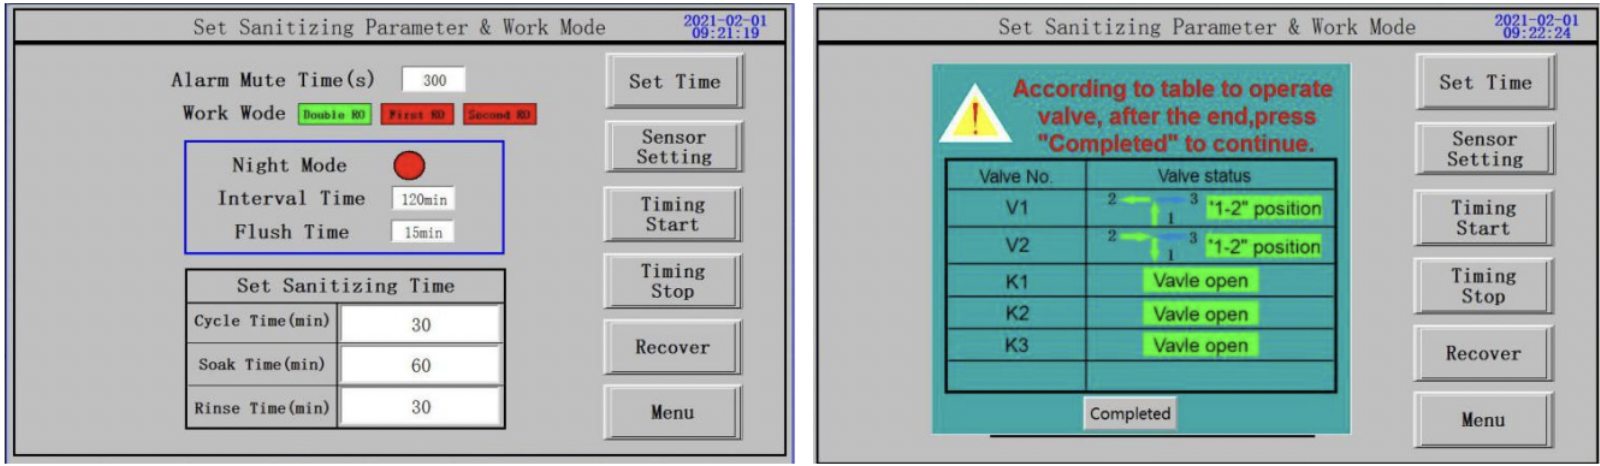
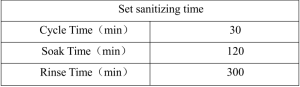
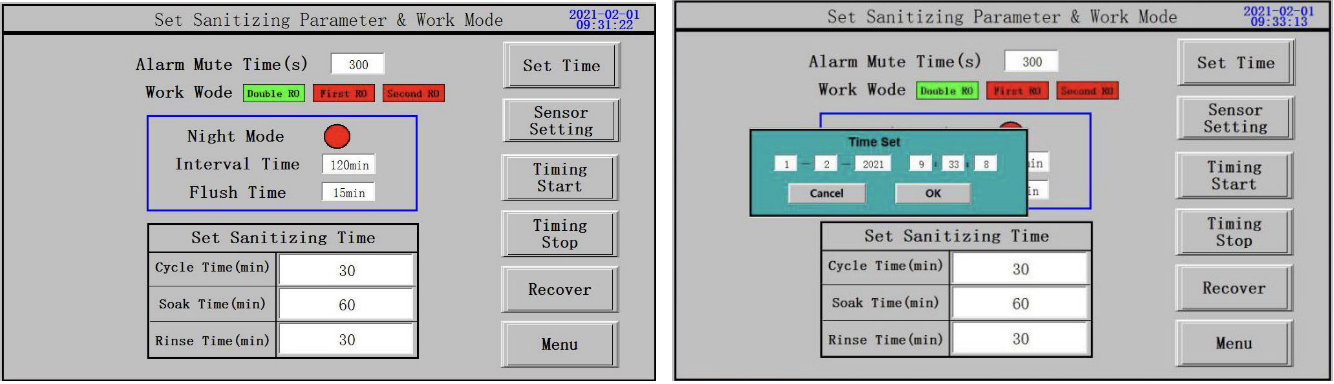
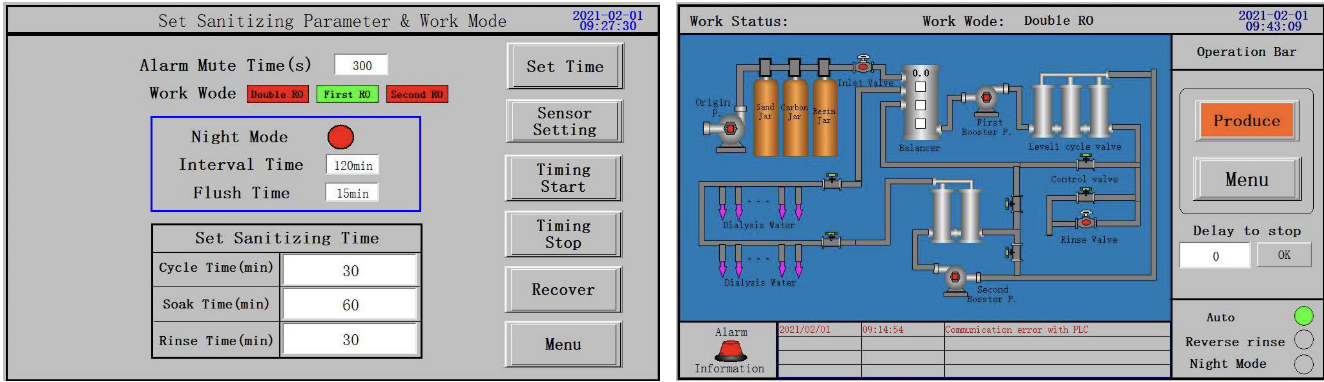
- Sanitizing parameter setting
> Set sanitizing parameters on the “parameter setting” page (as shown in the figure)
>Enter the time to be set in the time input box, (as shown in the figure);
> Set “sanitizing cycle time”, ” sanitizing soaking time” and “sanitizing washing time” in “disinfection
time setting”.
> General time Settings are shown as the following table:
- Date/time setting
> Press “Set time” on the “Parameter setting” page, modify the current time setting as below figure.
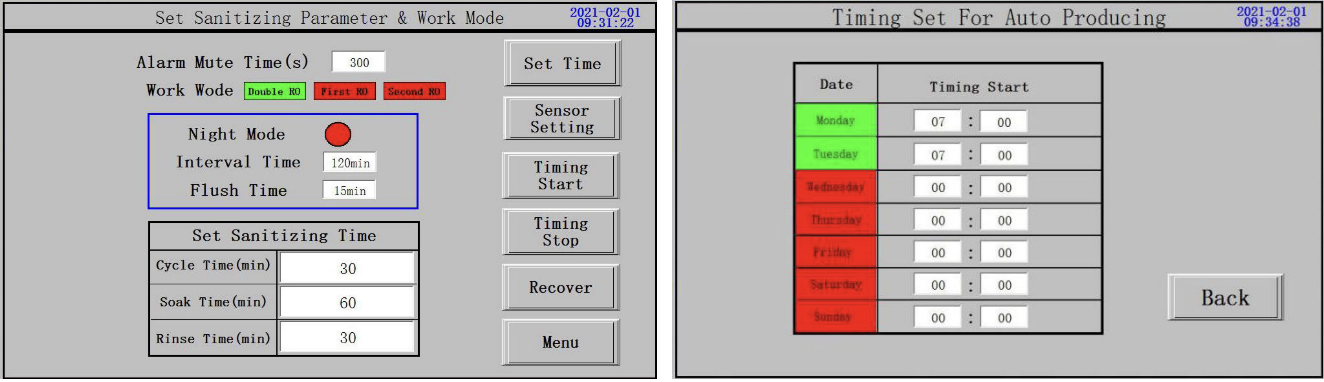
- Timing production setting
> Press “Timing production” on the “Parameter setting” page to set time for auto producing, the base unit
of the producing time is 30 minutes.
> To set “Timing production” only need to click the week under “date” to be “Green”.
> To cancel the “reverse rinse setting”, simply click the week under “date” to be “red”.
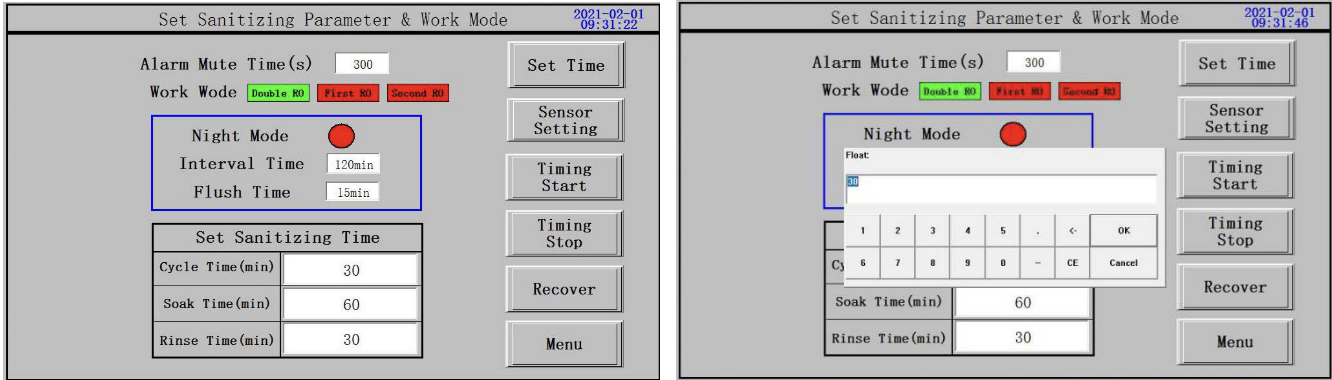
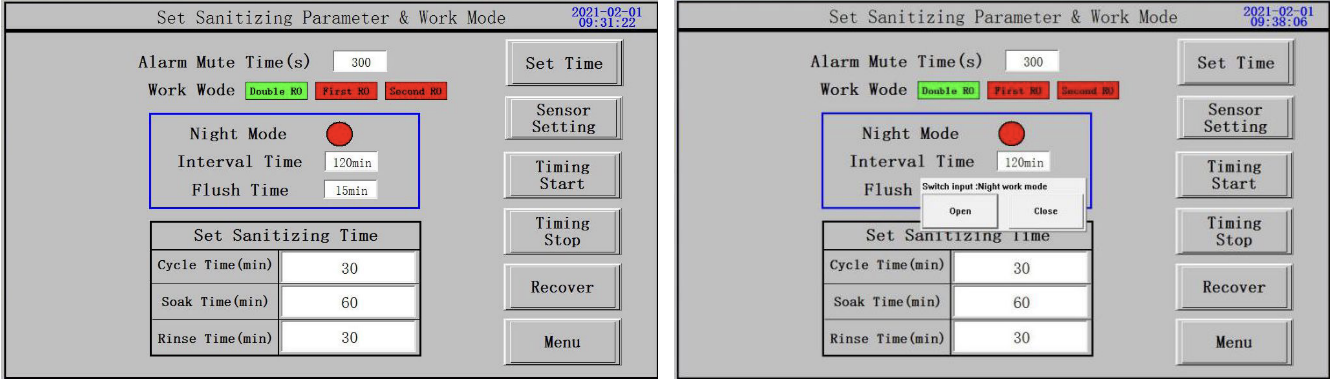
- Night mode setting
> Press “Night mode” to start setting on the “Parameter setting” page, choose “on” or “off”.
> Enter the time you want to set in the time input box.
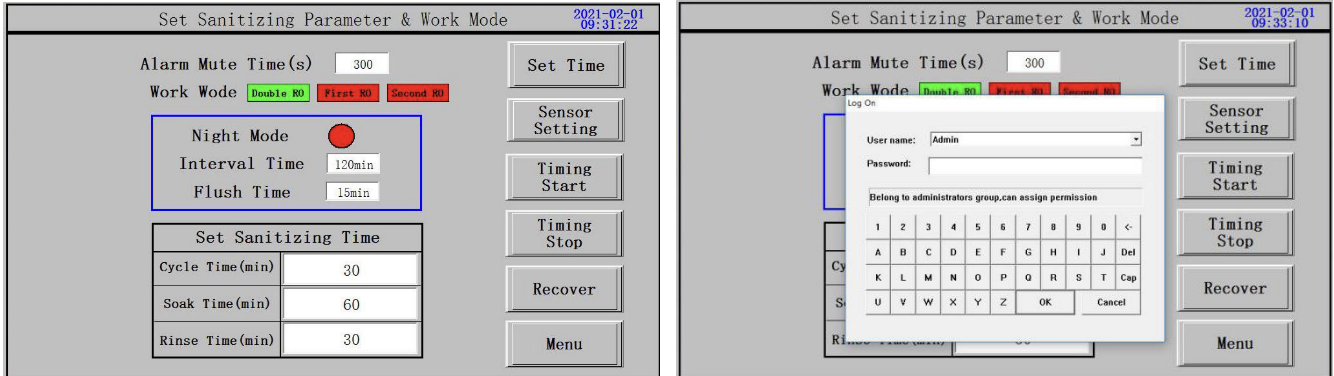
- Restore default setting
> Click “restore default” on the “parameter setting” page to set;
> When restoring the default setting,you need to enter the password”0806” and press confirm to restore the
factory settings.
- Control valve setting
> Refer to operation manual of control valve.
1.3. Water producing
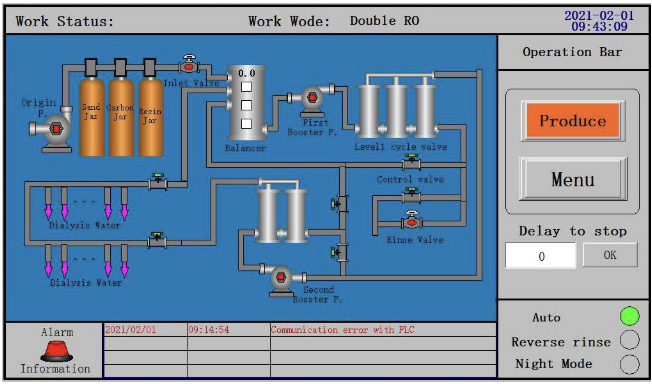
> Water making: click “water making mode” on the main page to enter the water making page. Click “water making mode” to enter the working mode,
> At this time “make water” button display orange, as shown in the figure.
> Stop the machine: click the “water making” button, and the device will shut down by itself;
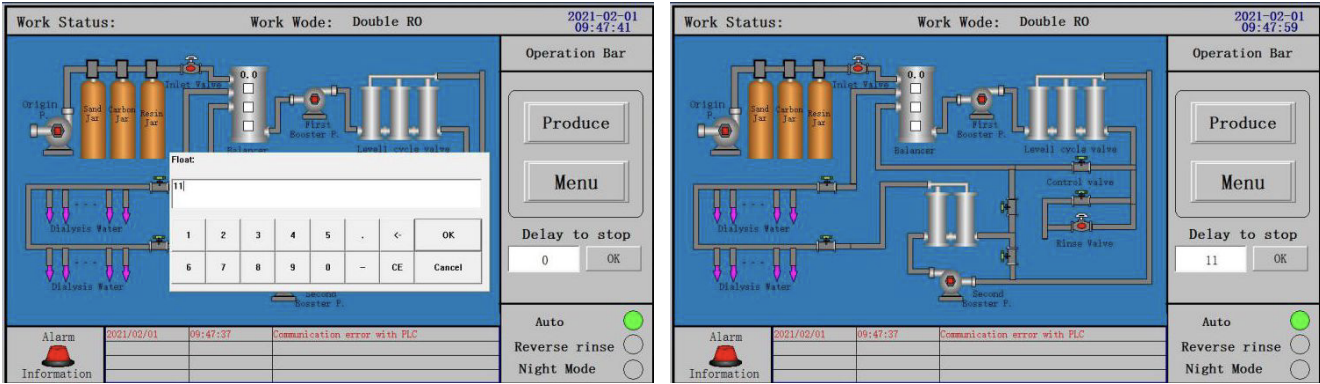
> Delayed water producing: in the system of “making water” menu, click on the “delay stop making water” input box, you will be prompted to input delay time, the input is completed, click “OK” in the system of “making water” page, click on the “OK” again, the words appear red countdown means set successfully, then device into a shutdown countdown, device automatically shut down later, as shown in figure
1.4. Disinfection
- Chemical Disinfection
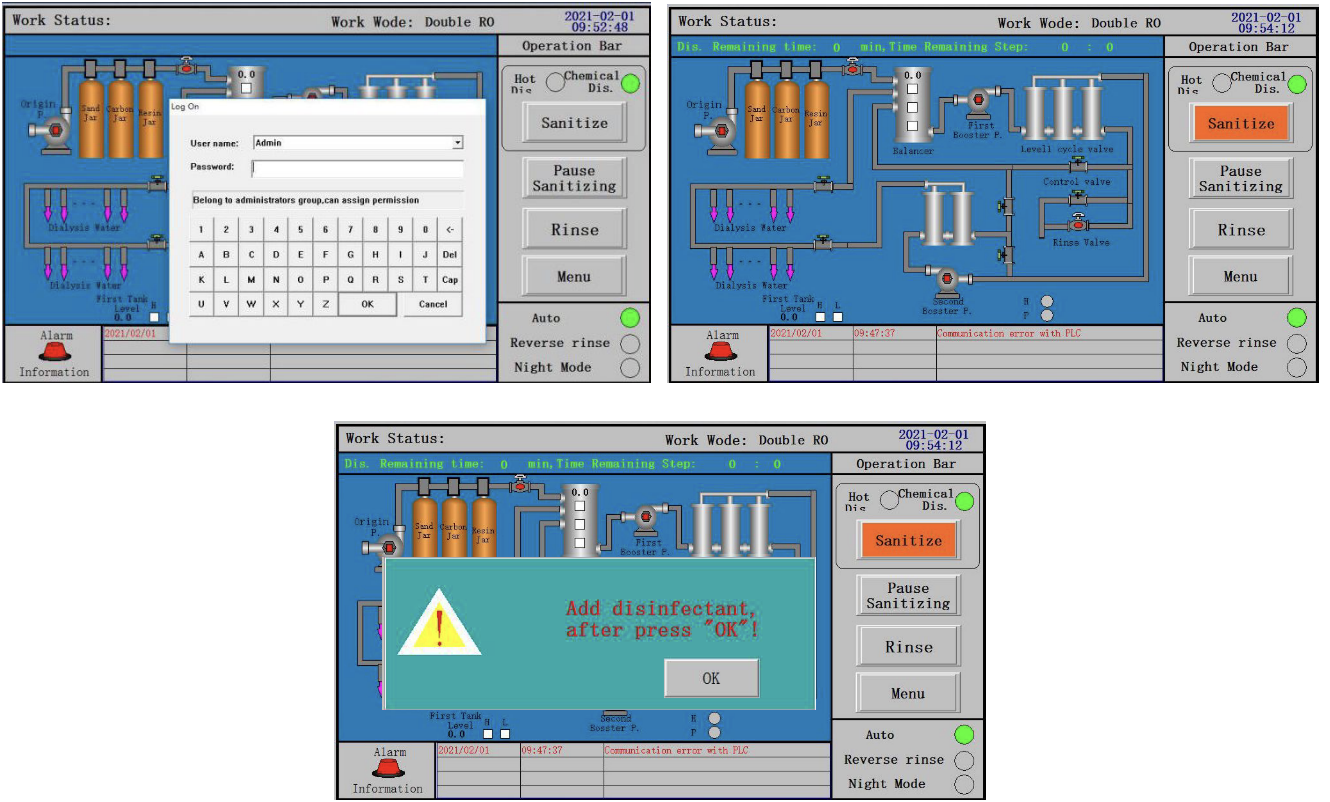
> Chemical disinfection: click “disinfection mode” on the main page to enter into the disinfection page and select “chemical disinfection”.
Note: the disinfectant uses 15-18% peracetic acid solution.
> Add disinfectant, click “disinfection” device to enter the working mode, at this time “disinfection” button shows orange.The disinfection procedure will remind you to add the
disinfectant. Click “OK” after adding the disinfectant, and the system will carry out “disinfection cycle”, “disinfection soak” and “disinfection rinse” according to the set “disinfection time setting”. The above steps are fully automatic.
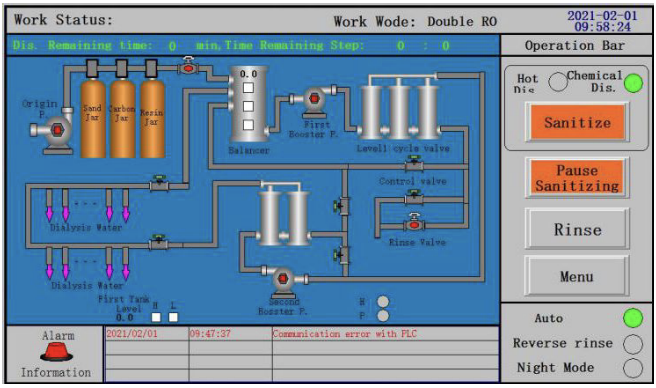
> .Disinfection pause, in the process of disinfection in case of emergency need to suspend disinfection, click “disinfection pause” on “disinfection” page, “disinfection pause” button
shows orange , if you want to continue disinfection, click “disinfection pause” again , “disinfection pause” button turn to white, as shown in the figure
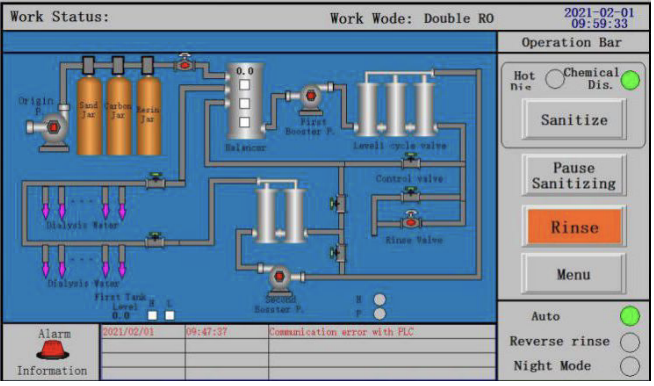
> Flushing, after completion of the disinfection, test the liquid in the outlet pipe ofwater treatment with the peracetic acid residual concentration test paper. the residual concentration should
be < 0.01%, if residue concentration exceeds allowable values, you can click “Flush” button on the disinfection page to flushing manually, until the residual concentration meet the requirement, and need to stop flush program manually , as shown in figure
Warning:
- The floor of the water treatment room shall be waterproofed and equipped with drainage outlets.
- In order to prevent electric shock when the device is leaking, do not install the electrical wire and power
socket on the ground. - The drainage outlet shall be located near the device.
- Be sure to read this manual before maintenance.
- Please read this manual carefully and understand its contents before maintenance,
- Please follow the instructions for maintenance.
- When doing the repaire and maintenance beyond the specification, please entrust professional.
- Do not tilt the device more than 10 degrees to prevent upside down.
- The power switch of this device should not be shared with other machines. The leakage current of other
devices may cause the overall leakage current to exceed the allowable value. - If the machine fails, contact the dealer or our company. Non-professional maintenance personnel are not
allowed to disassemble the machine without authorization.
Safety precautions:
> Proper operation and regular maintenance are essential for safe use of the device.Please read carefully the safety precautions in the operation manual, and use and store the device after fully understanding. The operation method and safety precautions shown in this instruction manual are valid only when the device is used within the specified scope.The operator shall be responsible for the safety of the device operated by means other than this instruction manual.
- A sign or sign language that attracts attention
In the event of a misoperation, the degree of expected danger and damage may be classified into the following three categories, each ofwhich is indicated by specific attentional signs and symbols.
> Danger !
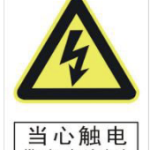
Beware of electric shock: electrical devices and circuits that may be at risk of electric shock
> Danger !
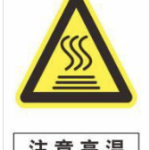
Note high temperatures: places where surfaces are burned
> Danger !

Grounding: lightning and static protection
> Danger !

Pay attention to safety: places and devices that are easy to cause injuries.
> Attention

In case ofwrong operation, the device may be malfunctioning.
